Saturday, April 30, 2011

decorative food plates.


Well, I haven't really posted in a few days since I've been getting over a cold and have been kind of unmotivated. However, I'm feeling better and I wanted to make a new blog post. This one's a little different, considering that the result won't actually be edible. I studied art in college and I love making things. So think of this as a recipe for some food-related decor. This is a slightly altered project idea that I got from a book called Print Workshop: Hand-Printing Techniques and Truly Original Projects. Trust me, it's fun.

the recipe
plain, clean plate (Target has very inexpensive, melamine plates)
photocopy, print off or photograph of food
scissors
Mod Podge
paintbrush


1. Cover the plate that you'll be using with a smooth coat of Mod Podge using the paintbrush. Set the plate aside to dry slightly.
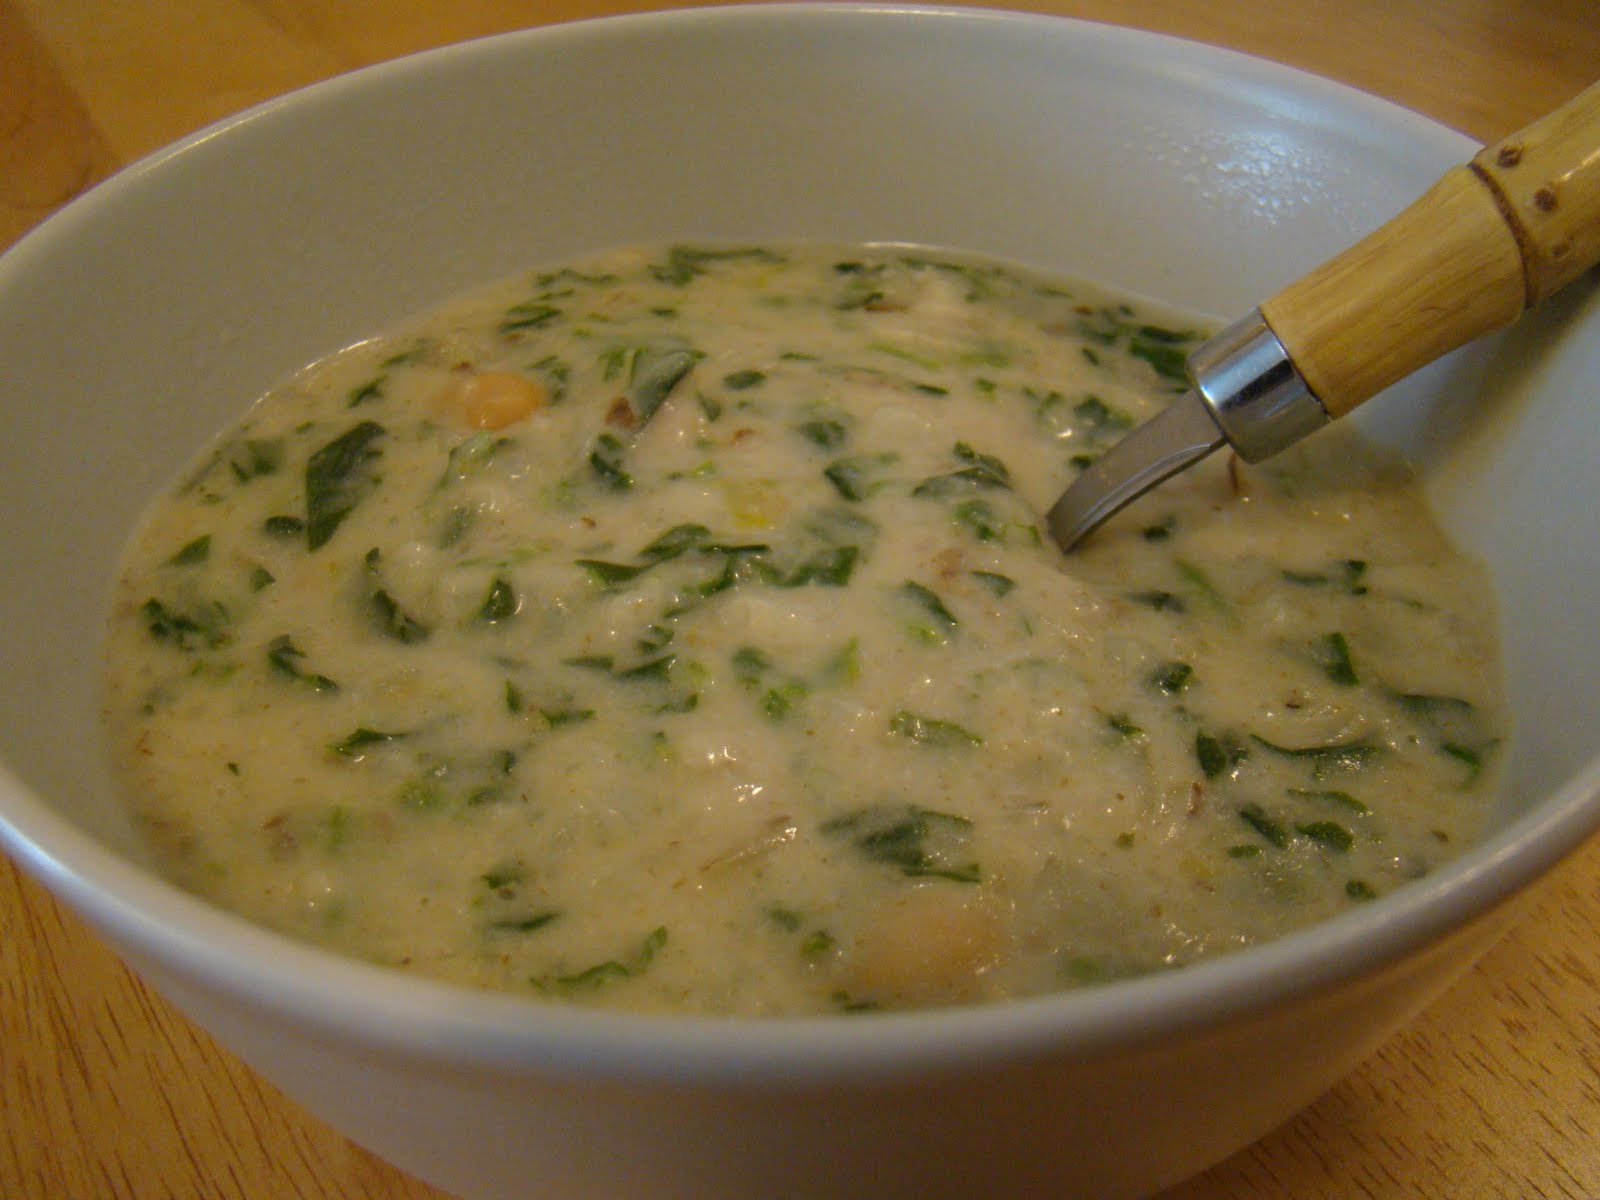
2. Get either a photograph, photocopy or print off of food that would be proportional to the plate that you have bought. I took pictures of a plate of food and then resize it on my computer to match the size of the plate I'd bought.
3. Carefully cut the food shapes out.
4. Arrange the food shapes on the plate. Put an additional coat of Mod Podge over the paper food pieces. Allow to dry completely.
Remember that these plates are for decorative use only. The plates cannot be submerged in water because of the Mod Podge, and they should not be used for food.


substitutions
You can probably use almost any kind of glue to paste the pieces down. I do like Mod Podge though, since it dries completely clear, does not wrinkle the paper, and adds a protective coating over anything.


great with
Plate wall hangers. These make really cute kitchen decor!


the review
These are ridiculously easy to make and I honestly love the way they look in my kitchen. My kitchen is decorated with lots of colors, like my green teapot, mismatched, mod-inspired silverware, and vintage, stained-glass owl napkin holder. These plates are fun and quirky and are exactly what I had in mind for the spare space on my walls. Keep in mind, your design doesn't have to be food, and it doesn't have to be for your kitchen. Lots of people have decorative plates in their homes. This could be a cheaper, and creative way to make your own.

Saturday, April 23, 2011

greek cheese and potato patties


About two weeks ago, I was preparing to donate blood for the first time. I was nervous, so I was just trying to do everything that I was told--drink lots of water, eat a hearty breakfast the day of, and intake lots of iron in the days leading up to the donation. I do the first two on most days anyways, so I began focusing on the third one, especially since I know vegetarians can sometimes have difficulty keeping their iron levels up. Every day the week before I donated blood, I made sure I ate something that contained spinach. 

Therefore, when I found the following recipe, another one from The Best-Ever Vegetarian Cookbook, I decided to add spinach and see what happened. 

the recipe
serves 4
1 1/4 lb potatoes
4 oz feta cheese
4 spring onions, chopped
3 tbsp chopped fresh dill
1 tbsp lemon juice
1 egg, beaten
flour for dredging
3 tbsp olive oil
salt and freshly ground black pepper

1. Boil the potatoes in their skins in lightly salted water until soft. Drain, then peel while still warm. Place in a bowl and mash. Crumble the feta cheese into the potatoes and add the spring onions, dill, lemon juice and egg. Season with salt and pepper (the cheese is salty, so taste before you add salt). Stir well.

2. Cover the mixture and chill until firm. Divide the mixture into walnut-size balls, then flatten them slightly. Dredge with the flour. Heat the oil in a frying pan and fry the patties until golden brown on each side. Drain on kitchen paper and serve at once.

substitutions
Honestly, I'm not even sure where to begin. I only had one potato, so that made things interesting right from the beginning. I added spinach--not sure exactly how much, I just broke off part of a block of frozen spinach. Since I didn't have enough potatoes, I added a little bit of flour to help with the consistency, since I was noticed that mine was clearly too runny. And I know this is going to sound ridiculous--probably because it really is ridiculous--but my family has a strange vendetta against dill that's a little hard to explain. Anyways, I ditched that particular seasoning and went with some oregano and pepper instead. As you can tell, there was a certain point where I just started ignoring the cookbook and basically started doing whatever I wanted.

great with
If I'm remembering correctly, I had some of this with a Morningstar Farms Chicken Pattie one night. I had the leftovers another night with just a salad. Both dinners were good.

the review
So this is one of those recipes that, once I got into it and realized just how much of the recipe I was not following, I was sure it was going to taste awful once I was done. I was surprised. These didn't taste awful. In fact, they tasted pretty good. I really liked being able to taste the lemon juice, although it was subtle. I also usually love anything with feta in it. Overall, the taste reminded me of something that I've had before, but can't quite place. Perhaps a spinach souffle (but only because I added spinach--I have no idea what it would taste like otherwise). Anyways, I look forward to making these again, hopefully with a little less stress.

And maybe I'll get over that thing with the dill. We'll see.

Thursday, April 21, 2011

garlic, chick-pea and spinach soup.


Supposedly, it's spring. Therefore, soup would be considered somewhat anti-seasonal. However, I'm not entirely convinced that it's spring, considering that it's still been very cold in good old Cleveland, Ohio. So warm up a little bit with one of my new favorite soups, once again from The Best-Ever Vegetarian Cookbook

the recipe
serves 4
2 tbsp olive oil
4 garlic cloves, crushed
1 onion, roughly chopped
2 tsp ground cumin
2 tsp ground coriander
5 cups vegetable stock
12 oz potatoes, peeled and finely chopped
15 oz can chick-peas, drained
1 tbsp cornflour
2/3 cup double cream
2 tbsp light tahini
7 oz spinach, shredded
cayenne pepper
salt and freshly ground black pepper

1. Heat the oil in a large saucepan and cook the garlic and onion for 5 minutes, or until they are softened and golden brown
2. Stir in the cumin and coriander and cook for a further minute.
3. Pour in the stock and add the chopped potatoes to the pan. Bring to a boil and simmer for 10 minutes. Add the chick-peas and simmer for a further 5 minutes, or until the potatoes and chick-peas are just tender.
4. Blend together and cornflour, cream, tahini and plenty of seasoning. Stir into the soup with the spinach. Bring to a boil, stirring, and simmer for a further 2 minutes. Season with cayenne pepper, salt and black pepper. Service immediately, sprinkled with a little cayenne pepper.

substitutions
I use regular white flour for the cornflour, and have also substituted milk for the double cream. All works the same. I also want to point out that I usually cut this recipe in half, as it makes quite a bit, and I'm usually only cooking for myself. 

great with
This stands really well on its own. I usually like dipping something into my soup, so I'll usually toast some whole-grain bread and add some butter and garlic powder onto it. If I'm having it leftover for lunch the next day, I'll pack it up with a handful of Wheat Thins.

the review
This is a delicious and filling soup that I absolutely love. I've never cooked with cumin or coriander before this recipe, and now, I really love both of them. This soup has an excellent flavor and several healthy ingredients to feel good about eating. I made this several times in the winter months, including for some dinner guests, and everyone enjoyed it. Soup has turned into one of my very favorite things to make, and this particular soup has become a stand-out.

Sunday, April 10, 2011

meatless meatballs.


I come from a very Italian family which means that every Sunday, it's pasta for dinner. This is a tradition that I kept up when I was away at college, and that I now continue on my own. I love pasta, but really, what's pasta without meatballs? Well, for a vegetarian that can be a difficult thing, but luckily, my mom has this incredible recipe for meatless meatballs. They're truly amazing. 

I was recently telling some of my coworkers about this recipe and they didn't believe that they could be a suitable substitute for a real meatball. My dad's not a vegetarian, but he absolutely loves these and says you'd never know the difference from a real meatball. I made this recipe and brought it into my coworkers to share and sure enough, they agreed. I hope you do too.

the recipe
1 cup ground nuts (walnuts work well)
1 cup seasoned bread crumbs
2 whole eggs plus one egg white
1 small onion chopped fine
oil for frying
salt, pepper, parsley, and oregano to taste
tomato sauce

Put the nuts and onions in a food processor and make sure they are well blended. Put in bowl and add additional ingredients and mix well. Form into balls and fry in oil in frying pan. After meatless balls are browned, put in sauce and simmer for half an hour. 

substitutions
I don't actually have any for this recipe. I think that's a first.

great with
Pasta, of course! I usually start with a salad and then serve the meatballs over penne with a five cheese sauce. Delicious.

the review
Amazing, quite simply. I've grown up on this recipe and I love it. Having never actually consumed a real meatball (seriously) I can't compare this recipe to the real thing, but I hear that the texture and taste is quite similar to a real meatball. This recipe is sure to be a big hit with anyone. Give it a try and see for yourself.

Sunday, April 3, 2011

frittata with sun-dried tomatoes.


Once again, I bring you another fantastic recipe from The Best-Ever Vegetarian Cookbook. It really is the best-ever cookbook, and this recipe has quickly become one of my favorites.

the recipe
serves 3-4
6 sun-dried tomatoes, dry or in oil and drained
4 tbsp olive oil
pinch of fresh thyme leaves
6 eggs
1/2 cup freshly grated Parmesan cheese
salt and freshly ground black pepper

1. Place the tomatoes in a small bowl and pour on enough hot water to just cover them. Soak for about 15 minutes. Lift the tomatoes out of the water and slice them into thin strips. Reserve soaking water.
2. Heat the oil in a large non-stick or heavy frying pan. Stir in the onion and cook for 5-6 minutes or until soft and golden. Add the tomatoes and thyme and continue to stir over moderate heat for 2-3 minutes. Season with salt and pepper.
3. Break the eggs into a bowl and beat lightly with a fork. Stir in 3-4 tbsp of the tomato soaking water and the grated Parmesan cheese.
4. Raise the heat under the pan. When the oil in sizzling, pour in the eggs. Mix them quickly into the other ingredients and stop stirring. Lower the heat to moderate and cook for 4-5 minutes on the first side, or until the frittata is puffed and golden brown underneath.
5. Take a large plate, place is upside down over the pan and, holding it firmly with oven gloves, turn the pan and the frittata over on to it. Slide the frittata back into the pan and continue cooking until golden brown on the second side, 3-4 minutes more. Remove from the heat. The frittata can be served hot, at room temperature or cold. Cut into wedges to serve.

substitutions
I don't usually have thyme leaves, so I use a little bit of oregano instead. Also, I usually make this recipe a little smaller, usually using 3-4 eggs, and adjusting the rest of the items accordingly.

great with
Honestly, this is something that is pretty filling, so it can stand pretty well on its own, depending on what size frittata you make. I sometimes just have a salad or some snap peas with it.

the review
This...is so good. Seriously, I cannot emphasize how good it is. It's filling and hearty, and the sun-dried tomatoes, onions and cheese are just such a great combination. I will warn you that flipping the frittata can be a little messy--I usually have some egg on the flipping plate, but I'm not concerned, because the picture in the book does too. This recipe is in the "light lunches" section of the cookbook, but I make it for dinner all the time. It also makes fantastic leftovers--I'm the envy of my co-workers when I have it for lunch.